华为推出的 MateBook Pro 首次搭载了鸿蒙 PC 操作系统,使其能够直接运行鸿蒙手机应用和鸿蒙平板应用,但仅仅这样只能称得上是『大号平板』。
Electron 框架是优秀的跨平台客户端框架,通过改造,鸿蒙 PC 上也能运行 Electron 应用,具体如何操作呢?
编译 Electron
可以自己编译,也可以用华为预编译好的版本。
自己编译
参考文档:https://gitcode.com/openharmony-sig/electron
编译环境必须使用 Ubuntu 22.04,可以用虚拟机。
编译耗时很长,我用 8 核虚拟机 跑了大概 8 个小时左右,如无特殊需求建议用华为预编译好的版本。
1
2
3
4
5
6
7
8
9
10
11
12
13
14
15
16
17
18
19
20
21
22
23
24
25
26
27
28
29
30
31
32
33
34
35
36
37
38
39
40
41
42
43
44
45
46
47
48
49
50
51
52
53
54
55
56
57
58
59
60
61
62
63
64
65
|
sudo apt install -y git-lfs ccache curl python3 python-is-python3 python3-pip
python --version
pip --version
mkdir -p ~/bin
curl https://gitee.com/oschina/repo/raw/fork_flow/repo-py3 > ~/bin/repo
chmod a+x ~/bin/repo
echo 'export PATH=~/bin/:$PATH' >> ~/.bashrc
source ~/.bashrc
pip install -i https://pypi.tuna.tsinghua.edu.cn/simple requests
curl -fsSL https://deb.nodesource.com/setup_lts.x | sudo -E bash -
sudo apt install -y nodejs
node -v
npm -v
git clone -b master https://gitcode.com/openharmony-sig/electron.git
cd electron
git lfs pull
git config --global user.name "iMaeGoo"
git config --global user.email "mail1st@qq.com"
repo init -u https://gitcode.com/openharmony-tpc/manifest.git -b pc_chromium_132 -m pc_chromium_132_20251106.xml --no-repo-verify
repo sync -c
repo forall -c 'git lfs pull'
pushd src
find -name "*.git*" -exec rm -rf "{}" \;
popd
chmod +x override_files.sh
./override_files.sh
sudo ./src/build/install-build-deps.sh --no-chromeos-fonts
./electron_build.sh
source_path=./Electron实际目录/src/out/musl_64
destination_path=./electron
if [ -d ${destination_path} ];then
rm -rf ${destination_path}
fi
mkdir ${destination_path}
cp ${source_path}/libelectron.so ${destination_path}
cp ${source_path}/libffmpeg.so ${destination_path}
cp ${source_path}/libadapter.so ${destination_path}
cp ${source_path}/electron ${destination_path}
cp ${source_path}/icudtl.dat ${destination_path}
cp ${source_path}/v8_context_snapshot.bin ${destination_path}
cp ${source_path}/chrome_100_percent.pak ${destination_path}
cp ${source_path}/chrome_200_percent.pak ${destination_path}
cp ${source_path}/resources.pak ${destination_path}
mkdir ${destination_path}/locales
cp ${source_path}/locales/zh-CN.pak ${destination_path}/locales
cp ${source_path}/locales/en-US.pak ${destination_path}/locales
|
使用预编译版本
没有调用 addon 和 ArkTS 的需求时可以直接使用以下二进制 release 包进行开发。
获取最新日期的二进制 release 包,华为账号登录仓库,下载默认 Electron 34 的 release 包。
解压
搭建环境
安装 DevEco Studio,目前是 5.1.0,最新版即可
https://developer.huawei.com/consumer/cn/download/
配置环境变量,这样以后能方便地使用 hdc 等命令
假设安装路径是 D:\dev\DevEcoStudio,就在 PATH 中增加 D:\dev\DevEcoStudio\sdk\default\openharmony\toolchains
运行项目
打开 DevEco,打开前面编译/下载好的项目 ohos_hap
首次运行需要证书,按提示登录华为账号即可生成证书
跑起来的效果,按 Ctrl + Alt + I 可以打开调试
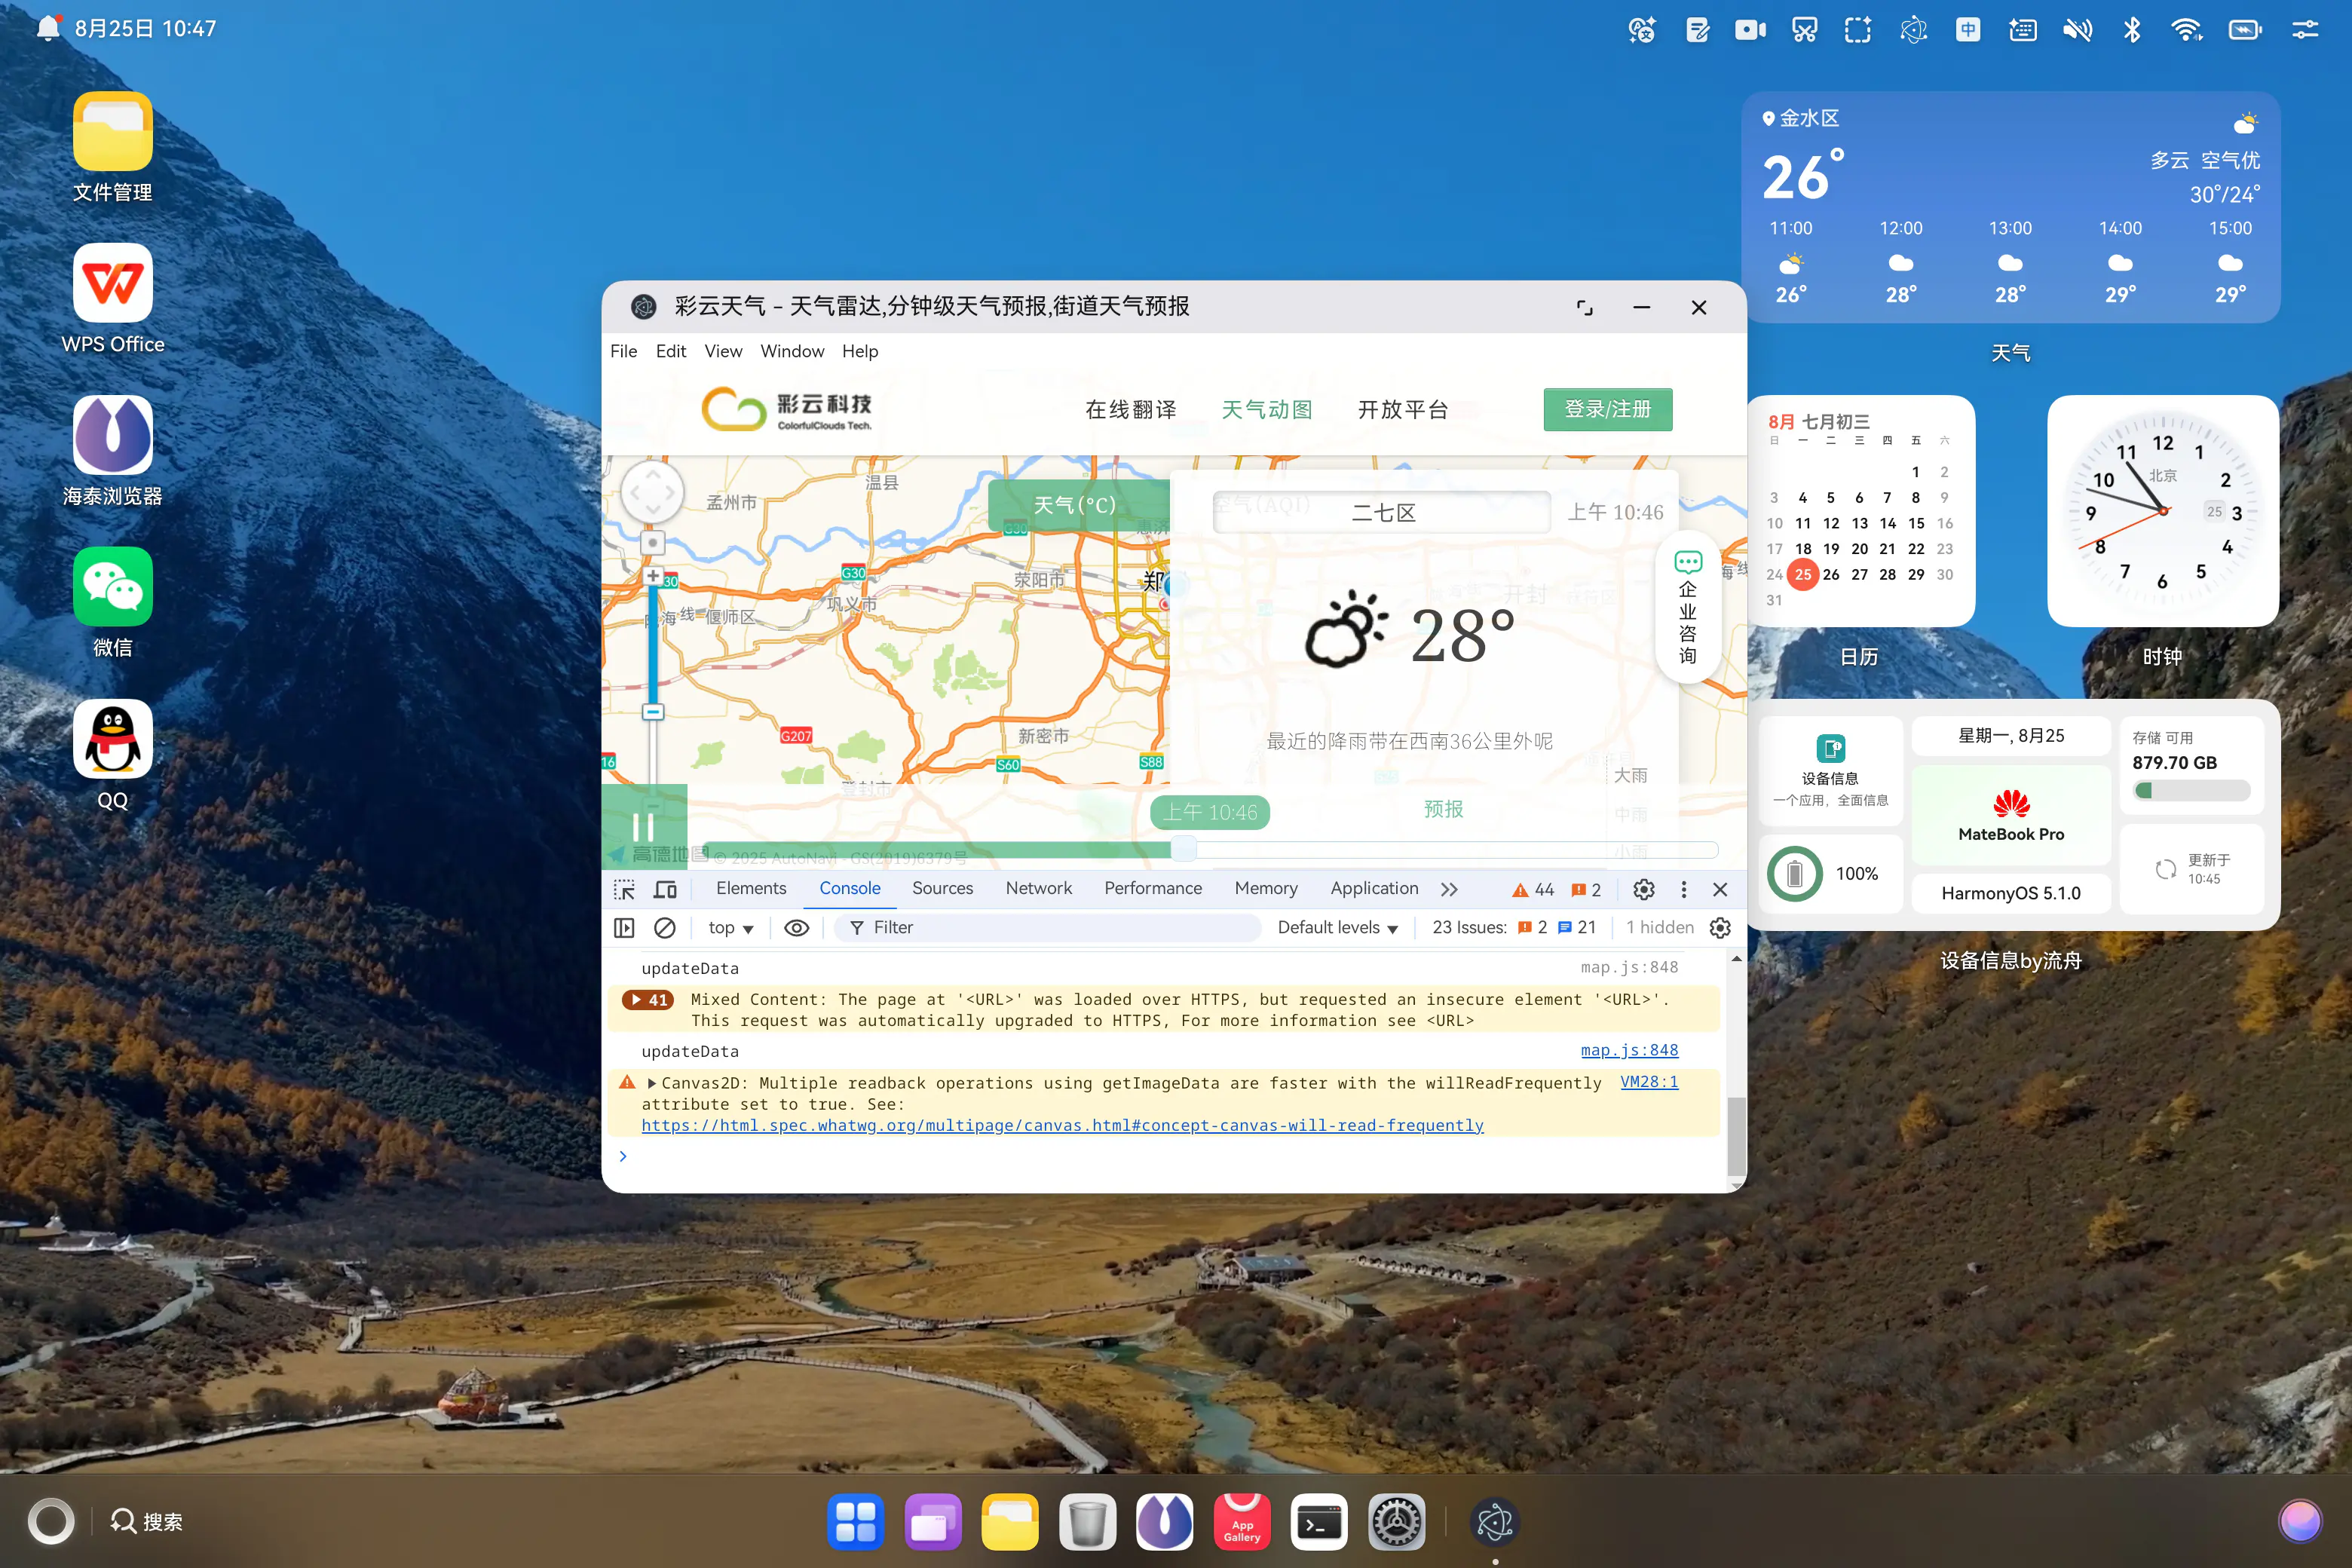
Electron 的入口点在 src/main/resources/resfile/resources/app/main.js,修改后重新运行即可看到效果
1
2
3
4
5
6
7
8
9
10
11
12
13
14
15
| const { app, BrowserWindow, Tray, nativeImage } = require('electron');
const path = require('path');
let mainWindow, tray;
function createWindow() {
tray = new Tray(nativeImage.createFromPath(path.join(__dirname, 'electron_white.png')));
mainWindow = new BrowserWindow({
width: 800,
height: 600,
});
mainWindow.setWindowButtonVisibility(true);
mainWindow.loadURL('https://caiyunapp.com/map/');
}
app.whenReady().then(createWindow);
|